
Sometimes our headlights get out of whack. Whether its because you got into an accident and need to replace the lamp, or maybe you just lean against it too much while drinking beers. Regardless of why, adjusting your headlights is a pretty simple task in the Xterra. The hardest and most important part of this job is ensuring that you set the job up correctly. Here’s what you will need.
- Your Truck…
- Some sort of adjustment screen that you will project your lights on. This could be a garage door, a wall, or something you create (like I had to)
- a long flat area next to your adjustment screen (40ish feet of it)
- A ratchet to adjust the lamp
- Tape
When I say you need a flat area I mean it needs to be FLAT. Like completely, utterly, totally level. If you do not have a level surface to place your truck on then you might want to wait until you find a place to perform this adjustment. The reason this is so important is that the adjustment length alone is 25ft. So if you truck is just slightly tilted or on a slope, that tilt or slope will be greatly exaggerated over the distance of the adjustment area. In fact, the manual I am using says you need to fill the gas tank, make sure the fluids are filled to the proper level, tires are inflated, spare tire is in place, ensure there is no additional load in the truck, and that the equivalent weight of the driver is in the drivers seat. Now technically most of these things should already be accomplished. You should always be checking your fluids and tire pressure, and your spare tire should always be in place. I do understand the fuel tank since its in the rear of the truck the difference in weight could make a difference. Anyway, moving on.
Once you have your truck and screen in place, measure the distance between the ground and the actual blub in the lamp. Once you have that measurement you need to mark that same height on your adjustment screen and put the top edge of your tap at that height. When you are ready, turn on your low beams, find your adjustment screws on the back of the lamps and make sure they are at 0 degrees. They will be on the lower portion of the light.
Then, take your ratchet and adjust your beam until the top of the beam is on the top of your tape line on your adjustment screen. This means that for the first 25 feet of your light beam should be exactly level. Here is the layout from the manual.
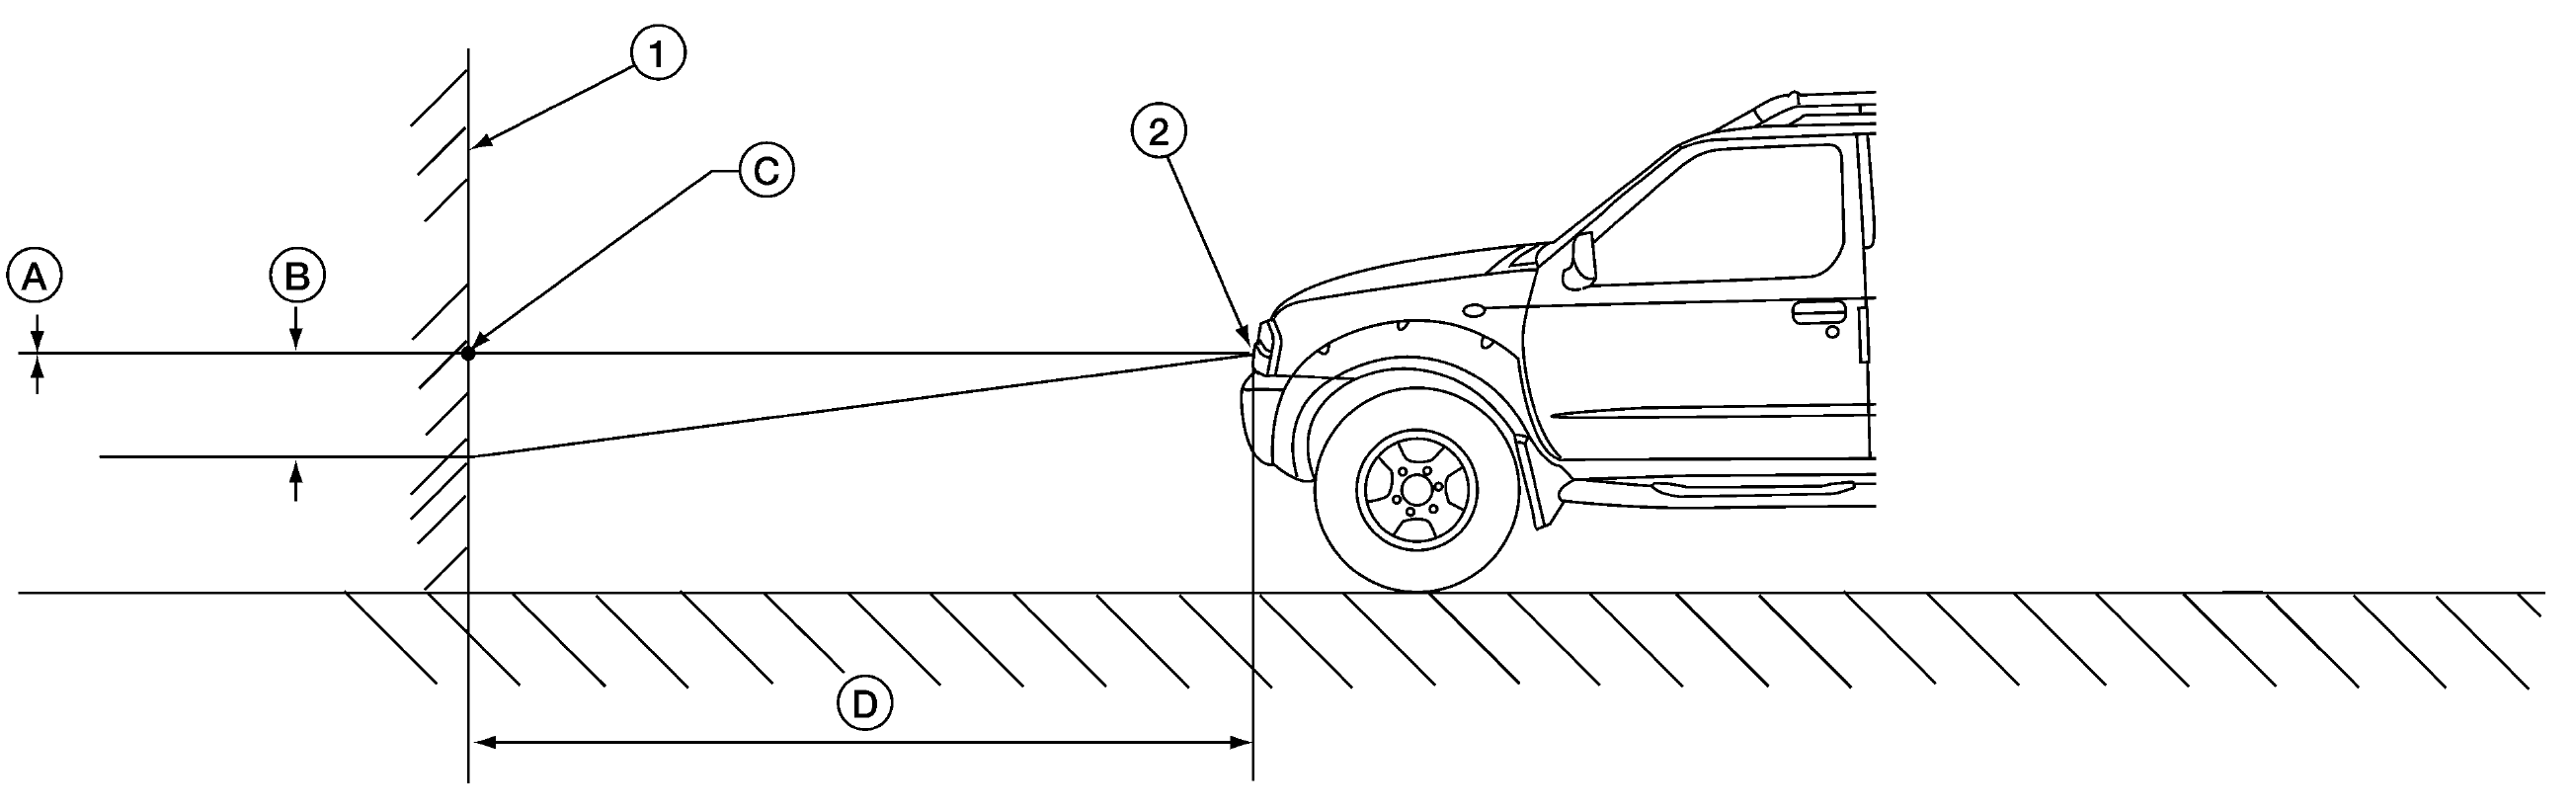
- 1 is the wall or screen you are using to project your beam onto
- 2 is of course the blub in your lamp
- D is your distance you want to be from your screen which again is 25 ft.
- C is the point at which the top of your beam should lie on your adjustment screen (the same height as your headlight from the ground)
- A and B are the variance you can have once you start getting past 25 ft. here are the variances
- A Minimum -3.3 mm (-0.13 in) 0.025° up
- B Maximum 36.6 mm (1.44 in) 0.275° down
As far as the horizontal adjustments I have some bad news. There are none.. If your lamp is shooting light way off to the left or right then there is something wrong with your lamp (or the sub frame it mounts to).
So that’s it! The set up of this job is twice as difficult as the actual adjustment but all in all its pretty easy. Not to beat a dead horse but again just make sure your tuck it LEVEL. That’s the most important part of this job. If everything is level then your adjustments should be good!
One more thing. If you live in an area where they love to regulate every little tiny thing then you might want to refer to local regulations in your area as it pertains to headlights.
Thanks for reading!